Car interior ambient lighting: routing, power, and what not to touch
The strip along the top of the dash looked fine in the garage; on the first night drive it is a bright line across the whole windscreen. The light is the easy part of this job. What matters is where the cable runs, where the power comes from, and that nothing you fit sits over an airbag or shows in the glass.
Key takeaways
- Do the footwells first: an hour's work, fully reversible, and it tells you whether you want the rest.
- Test at night, parked, before the trim goes back. Anything you can see reflected in the windscreen or mirrors moves.
- Never route over an airbag path — SRS panels, A-pillars, roof rails, seat sides — and never tap safety or engine circuits.
- Power from an ignition-switched USB or accessory socket; a fused add-a-circuit tap for a permanent install; never the battery direct.
- A 30 mA standby drain is about 10 Ah over a fortnight parked — enough for a no-start on a cold morning.
Never place strip, adhesive or cable over or across an airbag deployment path: panels marked SRS or AIRBAG, and the A-pillars, roof rails and seat sides on cars with curtain or side airbags. Do not tap circuits for airbags, ABS, engine management or any driver-assistance system, and do not splice into lighting circuits the vehicle monitors. Everything on this page concerns the vehicle's 12 V low-voltage side only. If you are not confident working on your vehicle's electrical system, have an auto-electrician do it — a bad tap in a modern car can trigger fault codes well beyond the lighting.
Legal before anything else. Interior lighting must never obstruct your view, reflect into the windscreen or side glass, or distract you while driving. Rules on vehicle lighting vary by country and often by region. Colours visible from outside the vehicle are commonly restricted — red and blue are reserved for emergency services in many jurisdictions. Check the rules where you drive and where the car is registered before you install, not after.
Which install are you doing?
"Ambient lighting" covers four different installs, and they need different lengths, different mounting and different brightness.
| Install | Where the strip goes | Notes |
|---|---|---|
| Footwell | Under the dash, aimed down at the floor | The easiest and the most useful. Nothing is visible except the light |
| Door cards | In or behind the door trim recess | Best looking, most work — the cable has to cross the door hinge |
| Dash and console line | Along a trim seam or under the console lip | Highest reflection risk. Must be hidden and aimed away from glass |
| Under-seat | Beneath the front seats, lighting the rear footwells | Easy, and it keeps rear passengers happy. Watch seat rails and any seat wiring |
If this is your first install, do the footwells only. It is an hour's work, it is entirely reversible, and it tells you whether you actually want the rest.
The reflection test you do at night
This is the single most common way an interior lighting install becomes unsafe, and it does not show in daylight when you fit it. At night the windscreen and side glass are partial mirrors from the inside. Any light source with a direct line of sight to the glass appears as a reflected image floating in your field of view, and a strip along the top of the dash produces a bright line across the whole windscreen. It is tiring to drive with, and it hides things that are really out there.
- Mount so the LEDs themselves are never visible from the driver's seat. Strip tucked behind a lip, throwing light onto a surface, emitters hidden.
- Before the trim goes back, park somewhere dark and sit in the driver's seat with the lighting on. Look through the windscreen and both mirrors.
- Move anything you can see reflected. Two minutes, and not optional.
Where the cable goes
Interior trim is designed to come off, and almost every route you need already exists.
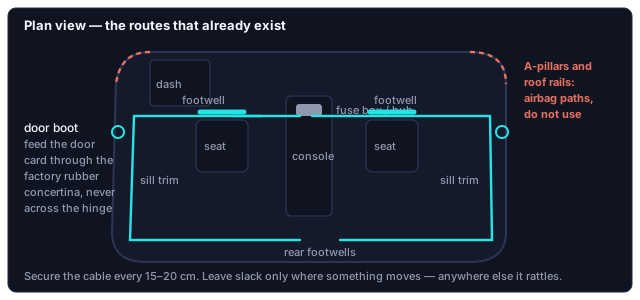
- Start at the power source and work outward. Usually the fuse box or a socket in the console, so the console is the hub and everything radiates from there.
- Use the sill trim. The plastic sill covers along the door openings lift with clips, and there is a cable channel beneath them already carrying factory wiring. This is the route from front to back on both sides.
- Cross to the footwells behind the kick panels. The panel each side of the centre console comes off with a couple of clips, and there is space behind it.
- For doors, use the factory rubber boot. Where the loom crosses from body to door there is a flexible concertina boot. Feed your cable through it alongside the existing wires — never route across the hinge in the open. A cable crossing a hinge unprotected will be cut, and cut at exactly the point that is hardest to reach.
- Secure everything every 15–20 cm. Cars vibrate constantly. Unsecured cable chafes through its insulation over months, and unsupported joints fail from fatigue rather than from load.
- Leave slack at every moving part and nowhere else. Slack elsewhere becomes a rattle.
Before removing any trim, find out what is behind it for your specific model. Modern cars route airbag inflators, sensors, seatbelt pretensioners and antenna cabling through places that look empty. Ten minutes on a model-specific forum or in the workshop manual saves a panel.
Where to take the power from
| Source | Switched with ignition? | Voltage | Work involved | Use it for |
|---|---|---|---|---|
| USB socket | Usually | 5 V | Plug in | A first install, with a 5 V strip and controller |
| 12 V accessory socket | Some are; some are permanently live | 12 V | Plug in | A reversible install, once you know which kind yours is |
| Fuse box, add-a-circuit tap | Yes, if you pick a switched circuit | 12 V | Trim off, fused tap, factory earth point | A permanent install |
| Direct to the battery | No — always live | 12 V | Bulkhead run, inline fuse, switch | Avoid. Nothing here needs an always-live feed |
USB is the least invasive and, on most vehicles, ignition-switched, so the lighting cannot flatten the battery. The catch is 5 V: you need a 5 V strip and controller, or a converter. A 12 V strip on USB is not merely dim; the controller may not start reliably.
For a fuse-box tap, use a proper fused piggyback tap, not a wire pushed into a fuse slot. Pick an ignition-switched circuit with spare capacity, fuse the new branch at or below the rating of the wire you added, and take earth to a factory earth point rather than any convenient bolt. A permanently live accessory socket lets the lighting stay on with the car parked — the same problem as a battery feed, with the numbers below.
Parasitic drain, with numbers. A controller in standby drawing 30 mA takes 0.72 Ah a day. Over a fortnight parked, that is about 10 Ah — a substantial share of a small car battery, and enough to leave you with a no-start on a cold morning even though the lights were off the whole time. If you must use a permanently live feed, put a switch in it, and use it.
Heat, sun and adhesive
A car interior in summer sun is one of the harshest environments consumer LED products get put into. A dashboard in direct sun regularly passes 70 °C, and the adhesive on standard LED strip is not specified for that.
- Clean with isopropyl alcohol, never with interior trim cleaner. Trim products leave a silicone film designed to stop things sticking. Adhesive applied over it fails within days.
- Add mechanical retention anywhere sun-exposed. Clips, cable ties through existing holes, or a screw into a non-structural trim rib. Treat tape as positioning, not as fixing.
- Keep strip out of direct sun where you can. Behind a lip or under an overhang, the strip is both cooler and invisible — the same place you wanted it for reflection reasons.
- Do not run strip across a defrost vent or any hot air outlet.
Setting brightness and colour so it looks factory
Three things from doing this repeatedly on our own test vehicles:
- Dimmer than you think. Set the brightness in a dark car park, not in a garage with the lights on. What feels right in daylight is glaring at night. If your controller supports scenes, save a low one and use it for driving.
- One colour, or two at most. Rainbow effects across an interior look busy in a confined space, and moving effects are a distraction while driving. Save motion — and music modes — for when the car is parked.
- Match the car's own instrument colour if you want it to look factory. Fighting the dash illumination with a different hue is what makes an install look aftermarket.
How the mainstream car kits are powered, and where their light comes from
| Kit | Light source | Power | Control | Documented complaints |
|---|---|---|---|---|
| Govee RGBIC Interior Car Lights (H7090) | Four 30 cm strips of 18 LEDs each, silicone-coated, dual-line, leads up to 1.8 m | 12 V from the cigarette lighter, with the car adapter in the box | Bluetooth app and remote; a microphone in the control box, four music modes | The backing adhesive needs reinforcing; the control box and cables live around the console because that is where the power is |
| Factory ambient lighting (Mercedes-Benz 64-colour, as one example) | Fibre-optic light guides in the trim, lit from the ends, so no visible LED dots | The car's own electrical system on the body bus, tied to drive modes and climate | The infotainment menu | Replaced as trim modules by dealers or specialists, not user-wired |
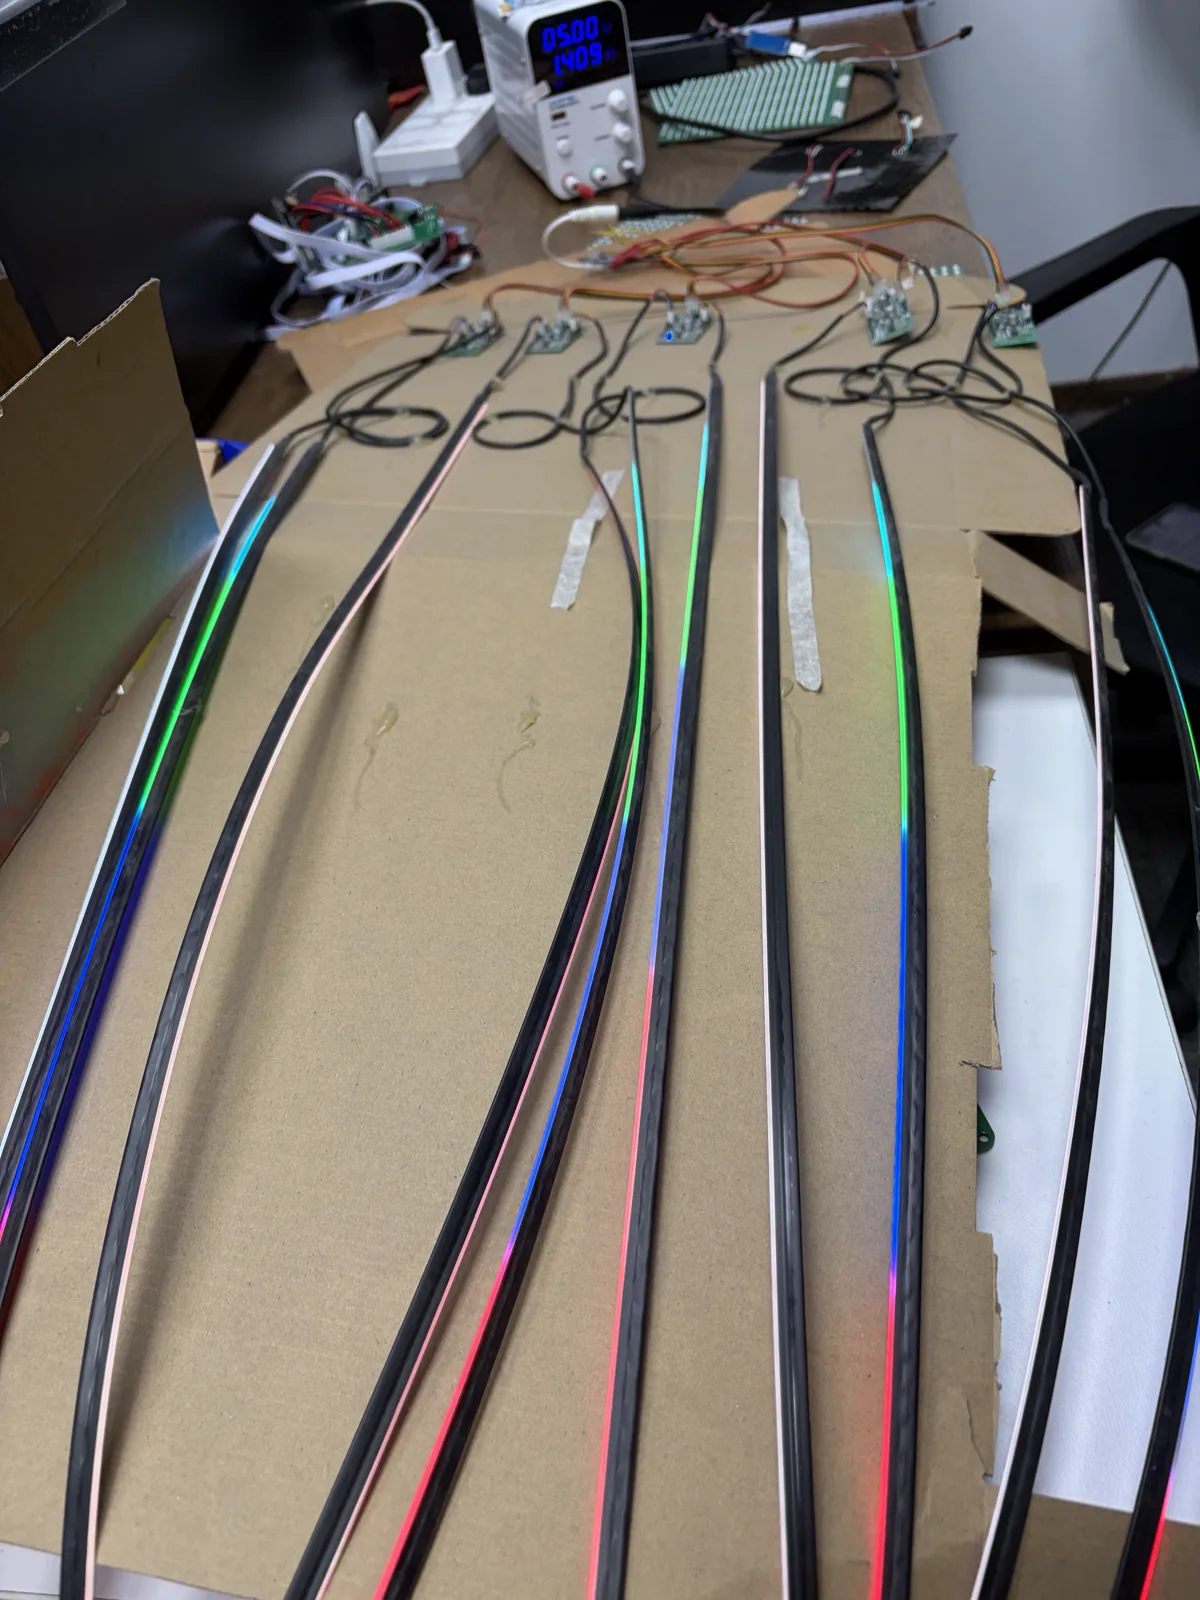
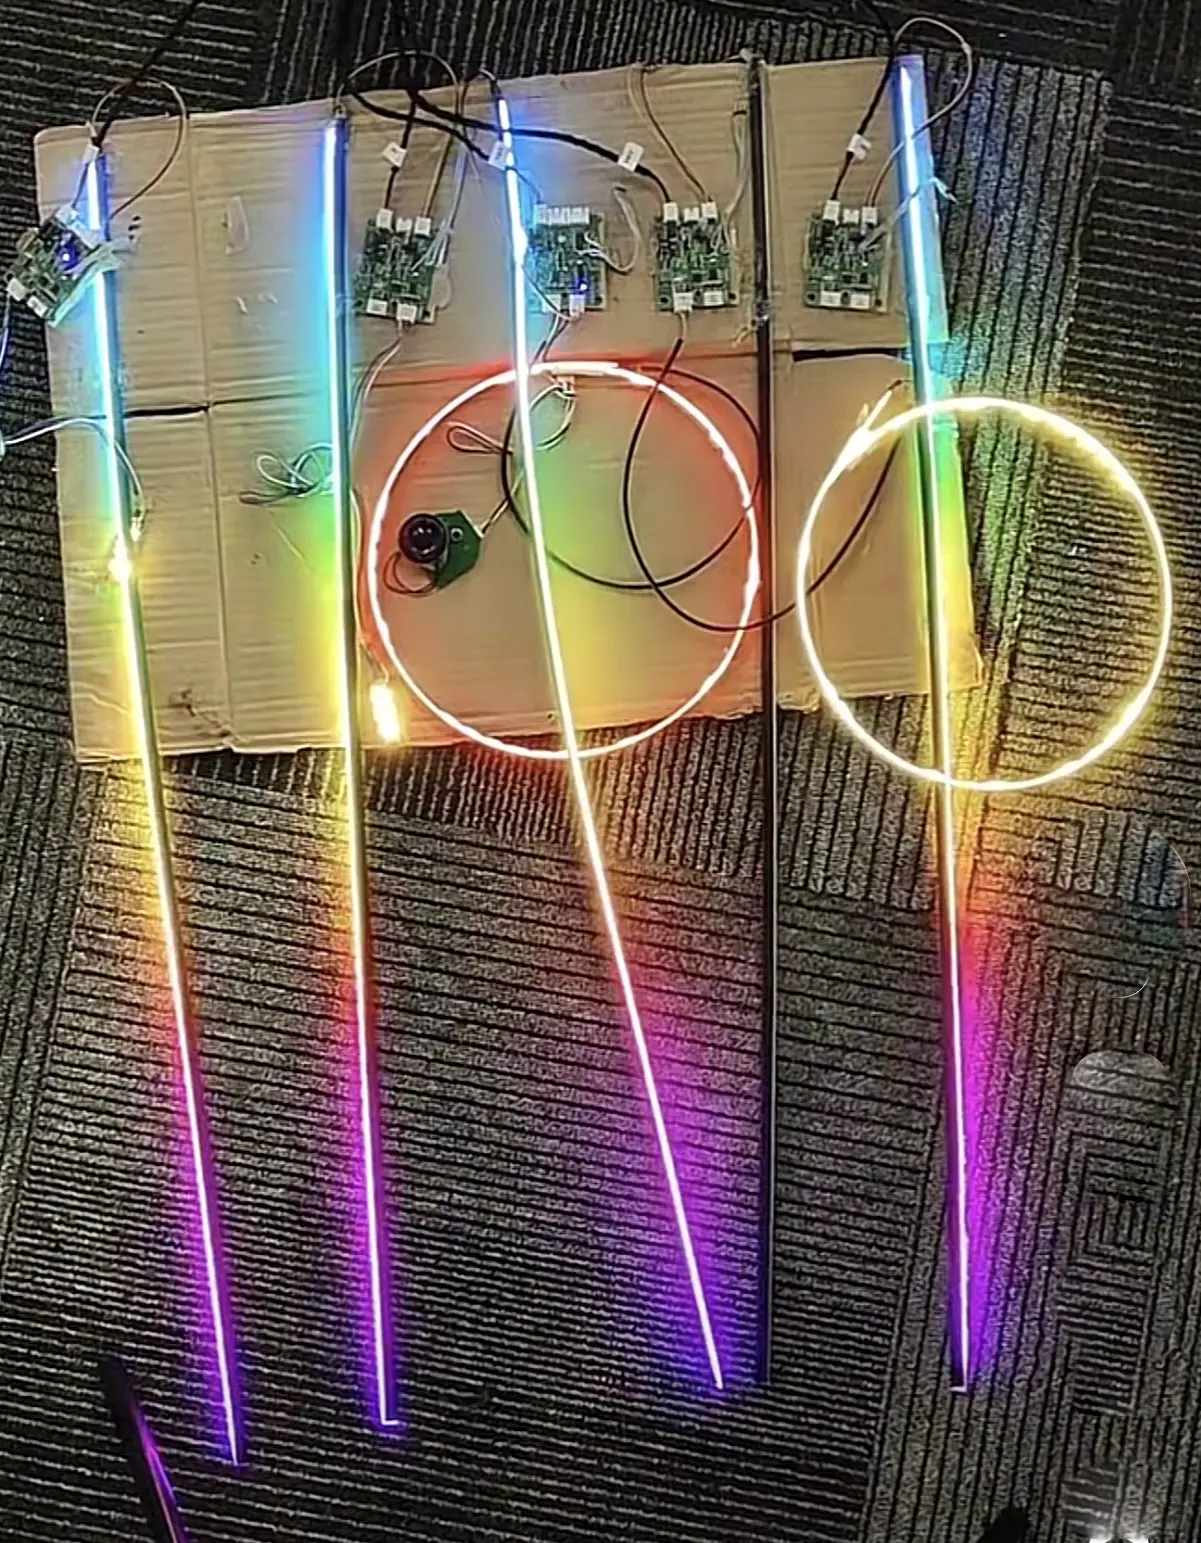
| Ours | 5 V fibre-optic strips, one driver board per strip (pictured above) | USB, the 12 V socket, or a fused feed from the fuse box, in that order of preference | LotusLamp X over Bluetooth | A standby draw of about 30 mA is the reason for the two-week drain arithmetic above |
The visible difference in the car is LED dots against a fibre line: the strip kits show a row of points at close range, while fibre, factory or ours, reads as an unbroken line. The wiring difference is where the power comes from: a cigarette-lighter kit puts everything at the console, while a fused feed lets the driver boards sit where the strips are, which is what the routing section above is for.
Source: Govee, RGBIC Interior Car Lights.
When it does not behave
| What happens | Why | What to do |
|---|---|---|
| Bright line across the windscreen at night | Strip on top of the dash with line of sight to the glass | Move it under a lip; repeat the night test |
| Controller will not start, or flickers, on USB | 12 V strip or controller on a 5 V socket | Use a 5 V kit, or a converter |
| Lights stay on after the car is locked, or a flat battery after a fortnight parked | Permanently live accessory socket or battery feed; standby drain | Move to an ignition-switched socket or circuit, or fit a switch and use it |
| Strip comes away from the dash in summer | Adhesive over trim dressing, or tape alone above 70 °C | Clean with isopropyl; add clips or a screw into a trim rib |
| Rattle from behind a panel | Slack cable away from a moving part | Secure every 15–20 cm; slack at hinges only |
| Door strip dies after a few weeks | Cable crossed the hinge in the open and was cut | Re-route through the factory rubber boot |
| Want it on when the door opens | Door circuits on modern cars are usually on a data bus, not a switched wire | Some controllers have a trigger input; involve an auto-electrician rather than guessing — guessing produces fault codes |
| App cannot find the controller | Wrong app | Our car lighting controllers run on LotusLamp X; see which app controls your light |
Will it pass an inspection? That depends on where you are and on whether the lighting is visible from outside. Fully concealed footwell lighting on a switched circuit is rarely an issue. Anything visible externally, anything flashing, and anything in a restricted colour can be. Check your local rules — we cannot advise for a specific jurisdiction. Exterior lighting has different rules and a much shorter list of what is permitted; for two-wheelers see motorcycle rear lighting.
Before you take any trim off
Power every strip up on the bench and pair it first — first-time pairing is easier on a table than under a dash — and save a low driving scene while parked. Then the footwells, then the night test, then decide whether you want the doors.
Questions about a specific car light of ours? Contact us.