How much LED strip does a TV backlight need?
A TV backlight kit labelled "for 55 to 65 inch" is guessing across 70 cm of perimeter. The length you need is fixed geometry: every modern set is 16:9, so the screen size printed on the box gives you the width, the height and the strip length exactly.
Key takeaways
- Three-sided run, no bottom edge: 2.6 m for a 55-inch, 3.1 m for a 65, 3.5 m for a 75. Four sides adds a fifth to a third.
- Inset the strip 2–5 cm from the panel edge. The size of the glow is set by the gap to the wall, not by brightness.
- Turn corners with a loop, a cut and connector, or a 45° fold. Never twist the strip flat or crease it across its width.
- Bias lighting is a steady neutral white near 6500K and under a tenth of screen brightness; colour sync needs a camera or HDMI box.
- Clean with isopropyl alcohol, press hard along the length, add a mechanical fixing at each corner; mount the controller to the wall, not the TV.
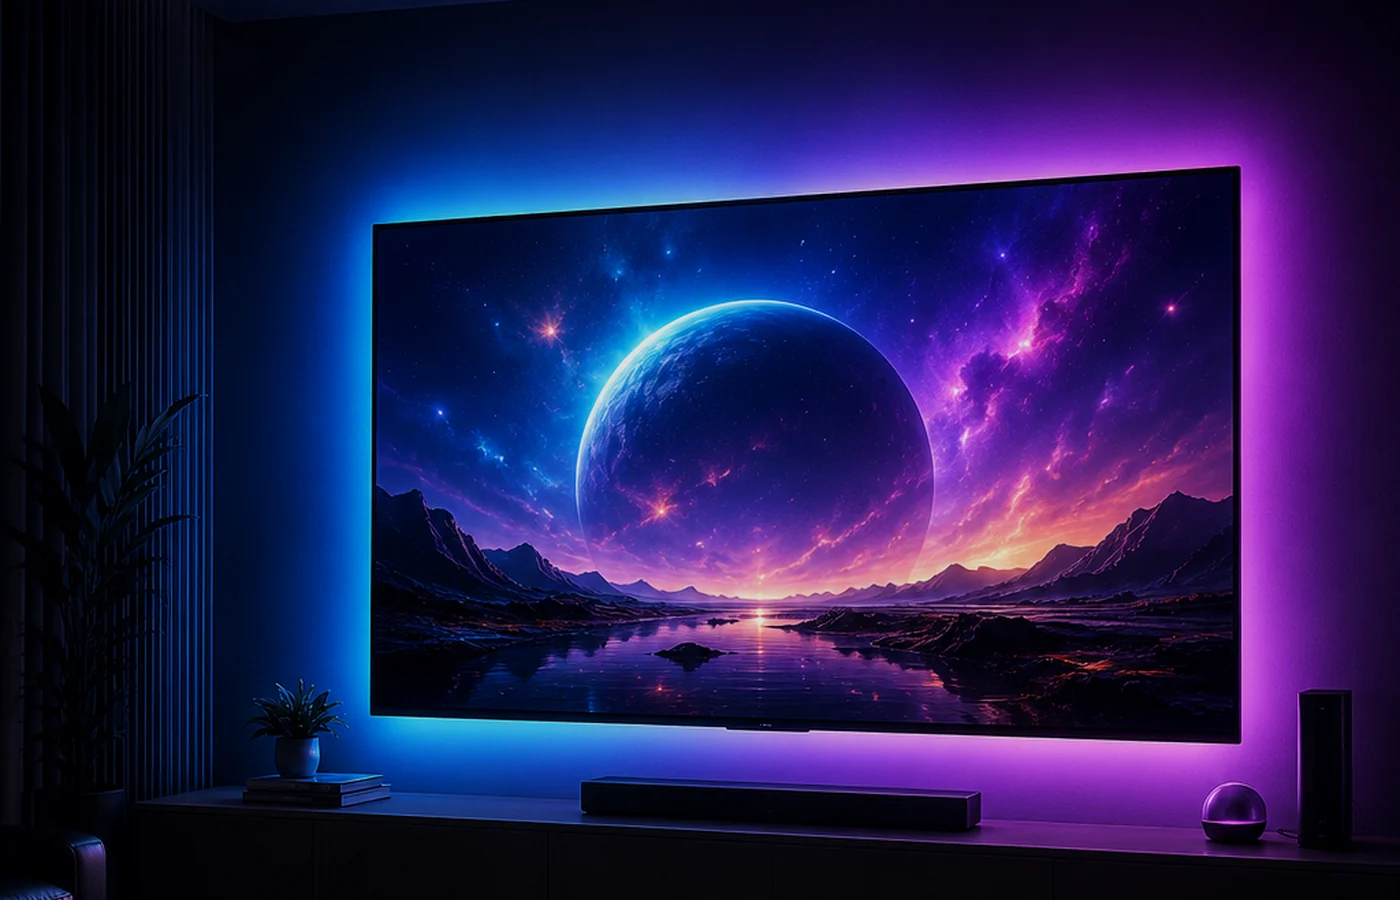
Work out the TV backlight length from the screen size
- Take the diagonal from the box, in inches. That is the only number you need.
- Width is diagonal × 0.872, height is diagonal × 0.490. Both follow from the 16:9 shape, so they hold for any current set.
- Four sides is diagonal × 2.724 inches, or diagonal × 0.069 metres. Three sides, skipping the bottom, is diagonal × 1.852 inches, or × 0.047 metres.
- Read the row for your size and buy that length or the next standard reel up.
| Screen size | Panel W × H | All four sides | Three sides (no bottom) |
|---|---|---|---|
| 43" | 0.95 × 0.54 m | 3.0 m (9.8 ft) | 2.0 m (6.6 ft) |
| 50" | 1.11 × 0.62 m | 3.5 m (11.5 ft) | 2.4 m (7.9 ft) |
| 55" | 1.22 × 0.68 m | 3.8 m (12.5 ft) | 2.6 m (8.5 ft) |
| 65" | 1.44 × 0.81 m | 4.5 m (14.8 ft) | 3.1 m (10.2 ft) |
| 75" | 1.66 × 0.93 m | 5.2 m (17.1 ft) | 3.5 m (11.5 ft) |
| 85" | 1.88 × 1.06 m | 5.9 m (19.4 ft) | 4.0 m (13.1 ft) |
These are panel dimensions, and the strip does not run along the panel edge. It sits inset from the edge, so the real path is slightly shorter than the table. Buy to the table figure anyway; the offcut is useful, and running 20 cm short at the last corner is the most annoying way to end an evening.
Can the strip be cut to length?
On plain single-colour and RGB strip, yes, at the marked cut points. On addressable strip you can cut but not rejoin arbitrarily: the data flows one way, so the offcut cannot be reversed and stuck on the other side. Plan the path to run continuously from the controller.
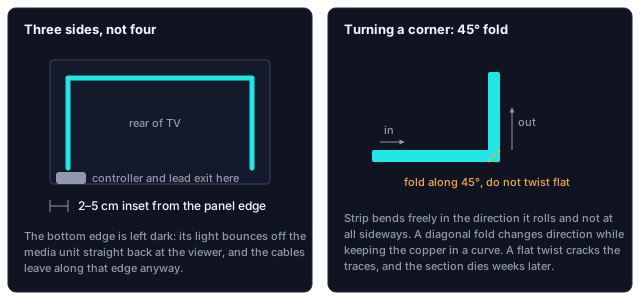
Three sides, not four
Skip the bottom edge. It saves a fifth to a third of the strip and it usually looks better.
The bottom edge is the one closest to whatever the TV stands on, so its light bounces off the media unit straight back toward the viewer. That reflection is far more visible than the glow on the wall, and it is the part people end up turning down or covering. On a wall-mounted set the bottom edge is also where the cables leave, so the strip has to detour around them.
Run up one side, across the top, down the other side. Start and finish at the bottom corners, which is where your controller and power lead want to be anyway.
Where exactly to stick it
Two measurements decide whether the glow looks like a halo or like a strip of LEDs.
Inset from the edge
Set the strip back 2–5 cm from the outer edge of the panel. Closer than 2 cm and light spills round the edge of the TV directly into your eyes, which reads as a bright rim rather than a glow. Further back than about 5 cm on a thin panel and there is not enough depth behind the set for the light to escape at all.
Distance to the wall
The glow is the light landing on the wall, so the gap between the back of the TV and the wall sets its size. A wall-mounted TV sitting 3 cm off the wall produces a tight, sharp halo a few centimetres wide. A set on a stand 15 cm out produces a wide, soft wash that spreads well beyond the frame. Neither is wrong, but if you want a broad glow and your TV is tight to the wall, no amount of brightness will produce it. You need the distance.
Corners: the part that goes wrong
LED strip bends easily in one direction, the direction that curls it into a roll. It does not bend sideways at all. Turning a 90° corner by twisting the strip flat cracks the copper traces inside it, and the failure appears weeks later as a dead section starting at that corner.
| Method | Appearance | Extra parts | Stress on the copper |
|---|---|---|---|
| A loop: let the strip bow out into a small loop and turn through it | Ugly if visible, invisible behind a TV | None | Lowest |
| Cut and rejoin at the marked line with a corner connector | Cleanest | One connector per corner | None, if the connector is seated. On addressable strip the arrows must point the same way round the whole path |
| A 45° fold: fold the strip back on itself diagonally | Flat and tidy | None | Low. The copper stays in a curve, not a crease. This is what we use on our own test sets |
Never fold a strip sharply across its width. A crease across the copper is a future open circuit. If a fold is needed, it must be the diagonal fold that keeps the copper in a curve rather than a crease.
Decide what the light should do: steady bias light or picture sync
These get conflated constantly, and the difference decides what hardware you need.
Bias lighting
A steady, neutral light behind the screen, left at one setting. It raises the brightness of the wall behind the TV so the screen is a less extreme contrast against its surroundings, which most people find more comfortable over a long viewing session. Set it to a neutral white, around 6500K if your strip has a white channel, and about 10% of the screen's own brightness. Then leave it alone.
Needs: any dimmable strip. Nothing clever.
Colour sync
The light follows what is on screen: green when the scene is a forest, blue when it is the sea. This requires something that can actually see the picture.
Needs: a device that captures the video, either an HDMI capture box in line with your source, or a camera pointed at the screen.
Why the colour temperature matters for a long evening
In a dark room the eye settles on the black surround, and every bright scene is a jolt it has to readjust to. A lit wall behind the set narrows the gap between screen and surround, so the eye stops readjusting and the picture reads as less harsh. The colour of that wall also shifts how you see the picture, because the eye judges white against whatever surrounds it. The professional viewing-room practice from SMPTE puts the surround close to D65, the same white point the panel is calibrated to, and below 10% of the screen's peak white. A living room does not need a meter; the point is that the 6500K and 10% figures are not arbitrary.
| Backlight colour | What the picture looks like against it |
|---|---|
| 2700K warm white | Cosy room, but whites on screen look bluish by comparison |
| 4000K | Mild version of the same shift |
| 6500K neutral | Matches the panel's white point; colours read as the film intended |
| A saturated colour | Tints your perception of the picture toward the opposite colour, and competes with it |
Brightness follows the same logic. If you can read a book by your backlight it is far too bright, and it washes out the darker parts of the picture, the opposite of what bias lighting is for.
A Bluetooth strip and a phone app cannot sync to your screen. There is no path for the picture to reach them. If a product promises screen sync with nothing but a Bluetooth controller, the "sync" on offer is a microphone reacting to your TV's sound. That is a real effect and can look good on action content, but it is not following the picture. Our music and microphone modes are documented as what they are: the three sync modes explained.
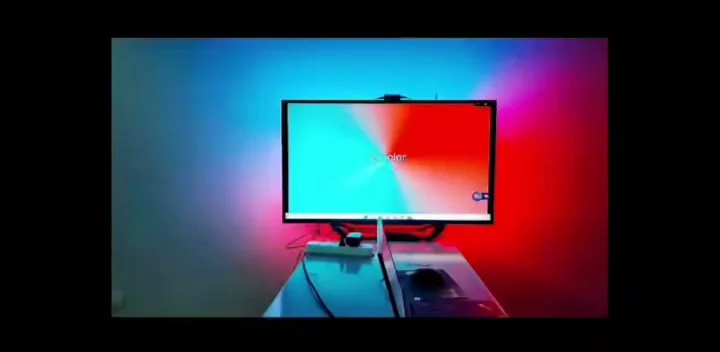
Our own view, having built both kinds: for most living rooms bias lighting is the better outcome. It is set-and-forget, it reduces the harshness of a bright screen in a dark room, and it never distracts. Colour sync is more impressive for the first week and is more often switched off by the second, because peripheral movement competing with the picture gets tiring.
Making it stay stuck
Adhesive failure on TV backlights is not really an adhesive problem. It is three things stacking up.
- The back of a TV is a low-energy plastic and it is dusty. Wipe it with isopropyl alcohol and let it dry fully. Not a damp cloth: water leaves residue and the tape bonds to the residue instead of the plastic.
- It gets warm. Panel electronics sit behind the screen and the whole back is warmer than room temperature in use. Warm adhesive creeps, and it creeps in the direction the strip is pulling.
- Corners concentrate the peel. A strip under a slight bend pulls hardest at the point of the bend, which is exactly your corner. Corners always lift first.
So: clean with alcohol, press the strip down along its whole length with firm thumb pressure rather than laying it on, and add a mechanical fixing at each corner: a small piece of double-sided mounting foam, a cable clip, or a tie through an existing chassis hole. Two minutes of reinforcement at four corners is the difference between a permanent install and a strip dangling behind the TV in six months.
One more: leave a slack loop of cable before the controller, and fix the controller to the wall or the media unit, not to the TV. A controller swinging on its own lead applies a steady pull to the last 10 cm of strip, and that section will eventually let go.
Problems that appear after the first evening
The far end is dimmer than the start
Voltage drop along the run. It is normal on longer lengths and more visible on white than on colour. LED strip length and power covers what to do about it.
A corner went dark after a few weeks
The strip was twisted flat round that corner and the copper has cracked. Cut on the marked line either side of the corner and rejoin with a connector; on addressable strip, keep the arrows pointing the same way through the joint.
The glow is a bright rim, not a halo
The strip is closer than 2 cm to the panel edge, or the TV is too tight to the wall for the light to spread. Move the strip inward first; if the halo is still hard-edged, the fix is distance from the wall, not brightness.
How the mainstream sync kits get the colour
Sizing does not change with the brand; every kit still has to reach round the same three edges. What differs is where the colour comes from, and that decides what goes wrong.
| Kit | Where the colour comes from | What it needs | Documented limits |
|---|---|---|---|
| Govee Envisual T2 (H605C) | Two cameras on the top edge look at the screen; 60 LEDs per metre, RGBIC | 2.4 GHz Wi-Fi and a Govee account for voice and remote control; the 55–65 inch strip is 3.6 m in four sections, the 75–85 inch about 5 m | Reviews still report colour deviation; owners describe a red glow on black scenes and room light reflecting off the screen; sync is switched on in the app each time |
| Philips Hue Play HDMI Sync Box 8K with the Play Gradient Lightstrip | Reads the HDMI signal, so room light cannot affect it; four HDMI 2.1 inputs with 4K120 and Dolby Vision pass-through | A Hue Bridge and account; the 65 inch gradient strip is 254 cm and 20 W; up to 10 Hue lights | Only sources that pass through the box can sync, so the TV's own apps cannot; owners report random input switching and resets of the whole chain |
| Nanoleaf 4D | One camera above or below the screen; 30 LEDs per metre in 10 cm colour zones | 2.4 GHz Wi-Fi only; no Thread or Matter on this kit | Moving the camera means recalibrating; screen reflections and a slight lag are the two complaints in reviews |
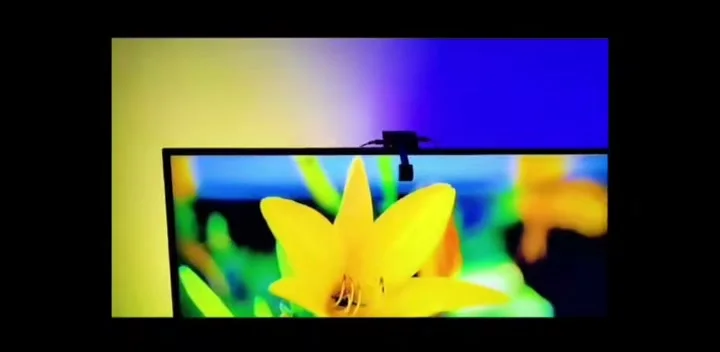
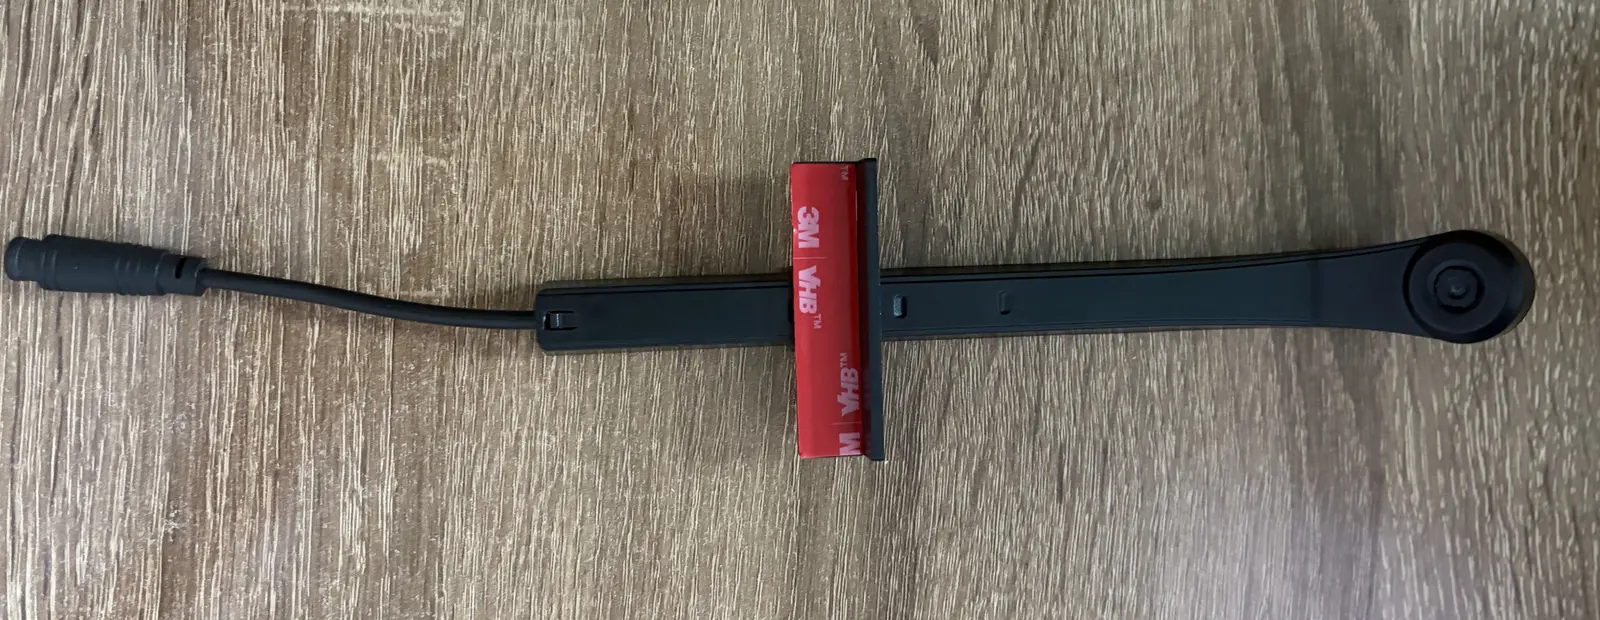
| Ours | A colour sensor on the screen edge, wired to the controller (pictured above); no HDMI box | Bluetooth direct through LotusLamp X, no account; the strip is sized by the table above | Camera-based, so it shares the reflection limit: keep lamps out of the screen's line of sight |
The choice is between two mechanisms, not between brands. A camera or sensor works with anything on the screen, including the TV's own apps, and is affected by room light on the panel; an HDMI box is immune to room light and blind to anything that does not pass through it. Ours is the first kind, which is why it matters where the room's lamps sit relative to the screen.
Sources: Govee, Envisual TV Backlight T2; Philips Hue, Play HDMI Sync Box 8K; Nanoleaf 4D.
What to do now
Read the row for your screen size, buy that length, and run three sides from bottom corner to bottom corner. Decide the corners before peeling any backing. Clean with alcohol, press hard, fix each corner mechanically, and mount the controller to the wall. Our TV backlight controllers run on LotusLamp X; if the strip shows one colour at a time across the whole run, that is the app you want. The full mapping is here.
Questions about a specific TV backlight controller of ours? Contact us.